
Unless you’ve been hiding under a rock, you’ve probably heard something about upgrading your site with SSL. It’s been in the news a lot.
But what does it mean?
If you’re confused about SSL and why it matters, you’re not alone. A lot of entrepreneurs are wondering whether they really need to worry about it – and what to do if the answer is yes.
So, let’s break it down.
SSL stands for Secure Sockets Layer. That might not mean much to you, but it means a lot to Google. Here’s why.
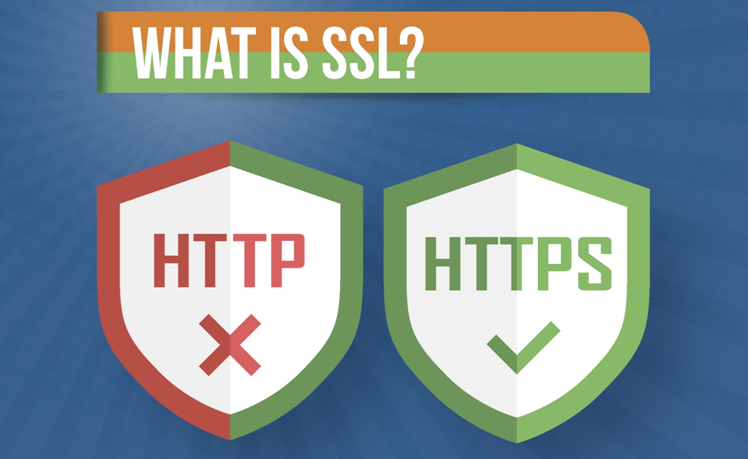
SSL is the standard encryption used to protect web users’ information when it’s transmitted online. You may have noticed that some websites’ URLs start with:
http://
While others start with:
https://
That “s” makes all the difference when it comes to security. When a user gives you their personal information, whether it’s an email address, a home address, a cell phone number, or a credit card number, they want to be confident that thieves and hackers can’t access their data.
It makes sense. SSL is the protection that stands between your customers’ personal information and the dishonest online predators who want to steal it.

What if your website isn’t a place where you collect private information? Do you still need to worry about SSL?
The short answer is yes. At the beginning of 2017, Google announced that by October, it would start labeling any sites not using SSL as Insecure. This was a change from their previous policy, which highlighted secure sites with a green padlock webicon on the browser bar.
The bottom line here is that even if you’re not collecting sensitive information on your site, you don’t want Google telling your visitors that your site isn’t secure.
Many of them won’t stop to consider that they have the option of not giving you personal information. They’ll just leave.
That’s a bad thing for obvious reasons. You want both your current customers and potential leads to feel that it’s safe to do business with you.
Once you’ve properly installed your SSL certificate, Google will display your URL with a gray padlock next to it. That tells customers that your site is secure.

The process of upgrading your SSL and complying with Google’s new rules isn’t a complex one, but it might seem that way to beginners. You’ll have to follow several steps to get it done. We’ll run through them here, but don’t worry if it seems like a hassle. At the end of this article, we’ll give you a link to a service that can take care of the whole thing for you.
Here are the steps you should follow.
Determine What Kind of Certificate You Need
There are three different types of SSL certificates, and you must
choose the proper one to make your site secure:
- DV or Domain Validation – suitable if you only need to protect a single domain
- OV or Organization Validation – suitable if you must protect many subdomains
- EV or Extended Validation – suitable if you must protect many domains
Most eCommerce stores will want to choose the OV or EV certificate to ensure that all areas of their site are secure. You can find more information about how to choose the right certificate here.

You’ll have to verify ownership of your site to generate the certificate.
Obtain or Purchase Your Certificate
Next, you must obtain your SSL certificate to install on your website. Some hosting companies offer certificates at no cost, but you also have the option of buying a custom certificate. The costs may range from less than $50 to more than $200, depending on your needs or where you buy the certificate.
Keep in mind that the SSL certificate you buy will need to be updated regularly. Each certificate is good for between one and two years. Most sites that issue certificates will allow you to sign up for automatic
renewals, so you won’t have to worry about your certificate expiring.
A good rule of thumb is to pay for a certificate only if you need to. If a simple DV certificate will do and you can get one at no cost, that’s what you should do.
Install Your Certificate
Now, it’s time to install your certificate. The specific installation process will vary depending on your host and server, and it’s not practical to list step-by-step instructions for every option.
That said, the process of installing a certificate is usually well-documented and you should be able to find instructions that tell you how to do it.

The tricky thing about the installation process is that it requires you to go in and do a lot of redirecting and tweaking to your site’s code after the fact. Every link that redirects users to the http:// version of your site must be updated to redirect them to the new, secure version.
It’s this part of the process that can be a roadblock for entrepreneurs. Without the specific technical knowledge to do it – and without time in their busy schedules – it can be easy to overlook links and leave your site partially or completely unprotected as a result.
Test Your Site
The final step is to test your site and make sure that the SSL is working the way it’s supposed to. There are
online tools you can use to do it, and your hosting company may give you a verification after you’ve completed the installation.
Just remember that testing is crucial. If you miss any step along the way, you might end up with only a partial installation.
Here’s Help If You Need It…
Whew – that sounds like a lot to do, doesn’t it? The good news is that you don’t have to do it on your own.
If you’d like a pro to help you upgrade your SSL and prevent Google from flagging your site as insecure, we recommend SSL Sniper. Click here to find out how they can help you get through the process of installing and testing your SSL certificate.
